Difficulty: 
Introduction[]
This tutorial is designed to be very basic and show you how straightforward it can be to make your own mods. It will cover concepts such as altering an existing item to make a simple new item, adding functionality to it, and working with the basics of tConfig.
Requirements[]
- tConfig must be installed correctly. When you run the game, it should display "tConfig" and a version number in the corner of the main menu. See the Install Guide for more details.
- You will need the default items if you do not have them already. You can download them on the Resources page.
Video Tutorial[]
Setting up the Environment[]
- The first thing we will need to do is make sure our mod environment is set up correctly so that tConfig will detect it. This guide assumes tConfig was installed correctly; you can refer to the Install Guide for more info.
- Navigate to: C:\My Documents\My Games\Terraria\
- There should be a folder inside called "Modpacks". Open this folder. If you do not have this folder, create a new folder called "Modpacks".
- Inside "Modpacks", create a new folder called whatever you want. This will be the name of your mod.
- Open the folder you just made. Create another one inside that one called "Item". It must be called "Item". The file path should now be: C:\My Documents\My Games\Terraria\Modpacks\<modname>\Item\
Creating Our Item[]
- We will make a basic craftable item that will sell for a good amount of money. Open a text editor and paste the following into it:
[Stats]
width=10
height=14
type=-1
maxStack=99
toolTip=A valuable alloyed coin that can be sold at a high price!
scale=1
value=2500
[Recipe]
Amount=5
needWater=False
Items=2 Silver Bar,2 Gold Bar
Tiles=Work Bench
- Now, go to File, Save As. Name the file whatever you want, but make sure you add ".ini" to the end of it. This is very important. For example, let's call it "Electrum.ini"
- If you want to make an item easily craftable for testing purposes, the usual suggestion is to make it craftable from wood instead. You could also use Yoraiz0r's cheat menu, found here: http://www.terrariaonline.com/threads/cmhq-community-modding-head-quarters.83140/
Items=1 Wood
- An explanation of each of the values in the list:
- "width" and "height" refer to the size of the box onscreen for collision detection. You don't have to really worry about setting appropriate values, but something around 8-16 is good.
- "type" is very important. Each unique item has its own type. A type of 40 would make this a Wooden Arrow, for example. But by saying -1, you are telling tConfig that hey, this is a custom item, and you should create a new item from this data!
- "maxStack" is how many copies of the item exist in one inventory slot.
- "toolTip" is the description when you mouse over the item.
- "scale" is a multiplier for how large to draw the item. Try setting it to 5 and throwing it on the ground to see what happens!
- "value" is how much the item is worth when sold. For Example "1000" means 1000 copper pieces. Another way to remember this is PPGGSSCC - that is, platinum, gold, silver, copper. Thus, 1000 really means 10 silver coins.)
- "amount" is how many items are produced from the recipe. Ammo produces multiplies, for example.
- "needWater" is whether you must be near water to craft the item (ie, bottled water).
- "Items" refers to the items you need to craft the item. Note that a comma with no space separates different items.
- "Tiles" is the name of the tile that must be nearby to craft this item. For example, we need a Work Bench.
- This may all look complex, but just play around with it and have fun! That is the most important thing! After you've made a few items, you should have a better understanding. However, we are not quite finished since we still need to give it a graphic.
Adding a Graphic[]
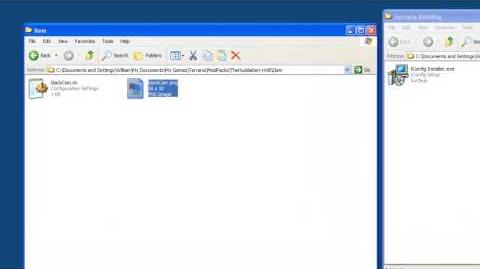
- Take the following picture and save it as "Electrum.png". Save it in the same folder as "Electrum.ini".

- There should now be two files:
- C:\My Documents\My Games\Terraria\Modpacks\<modname>\Item\Electrum.ini
- C:\My Documents\My Games\Terraria\Modpacks\<modname>\Item\Electrum.png
- Because we set "type=-1" above, tConfig will look for this .png file and use it ingame! You can use any .png image, but its name must match the item name.
Testing it Out[]
- Finally, we'll run the Modpack Builder that was included when you first installed tConfig. If you chose to have a shortcut on the desktop when you installed it, it should be there. Otherwise look in your Steam's Terraria folder for "Modpack Builder.exe"!
- Run it, and it will show a command prompt, showing the current tConfig version. It will ask you which mod you will want to build (compile) with a number beside it. You should see the name of the folder you created. Type the number beside it (usually "1"), then press enter.
- It will then attempt to compile your mod into a working .exe and .obj file. If it doesn't work, it should give you a reason why, and you can look over the file to correct your mistakes. If nothing is showing up in the window, then chances are your folder structure is not set up correctly.
- If everything works, then it will say "<mod name>.exe generated successfully!" in the window. At this point, you can run the game and go into the options menu to enable your mod. Make sure you hit "Reload Mods" so the data is actually loaded!
- Once you have enabled your mod, it will remain active until you disable it, so you do not need to reload it each time.
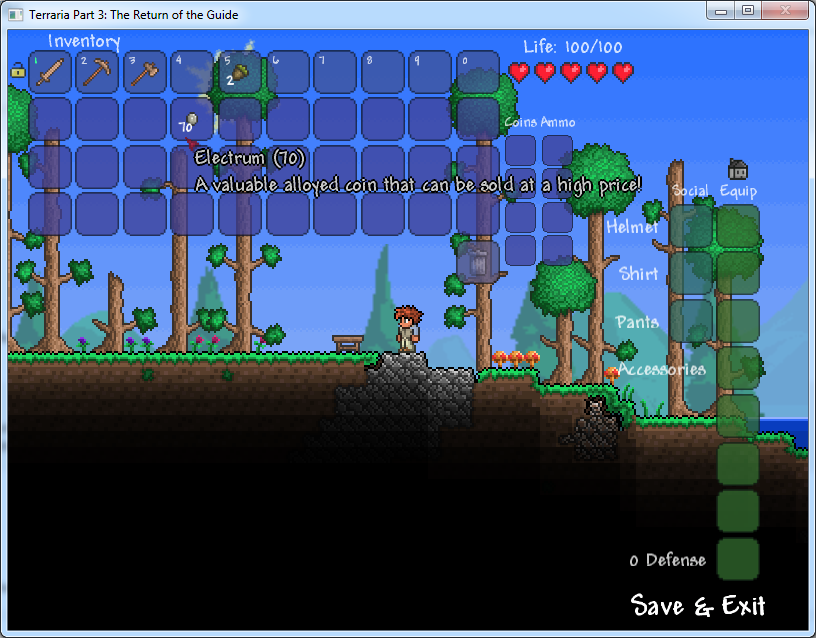
- Use a character and try to craft the item with the recipe you created. If it works, you should have no trouble creating coins to sell to merchants at a great price.
- If everything worked, you should see something like this:

Final Words[]
That's it! It's actually very simple and fast once you get the hang of it, and you don't even have to change much - just think of a similar item and copy it's .ini file and then change it around. You can also check out some of the other tutorials, or play around with it some more!
- Modding can be tricky. If you are experiencing any issues, feel free to leave a comment below, post on our forum thread, or even check out the live chat service we offer!
- You can also download a copy of the example here.