This guide is designed to enable the artistically challenged to create working, functional sprites of their own for use in Terraria mods. This guide will cover working with GIMP to take a full-scale photo or drawing and transform it into a sprite.
The three main goals of this guide are to:
Enable anyone, regardless of talent, to make sprites for Terraria
Use an easy-to-follow step-by-step process.
Preserve the beautiful pixelated art style of Terraria
Requirements[]
You will obviously need Terraria and tConfig installed. Refer to the Install Guide if you need to.
You will need a picture editing program of some kind. Photoshop works splendidly, but this guide assumes you have GIMP installed.
This guide also assumes you know how to use that program in a basic sense, such as zooming in and out, opening multiple image files, and using various selection tools.
Creating the Sprite[]
Step 1: Source Picture[]
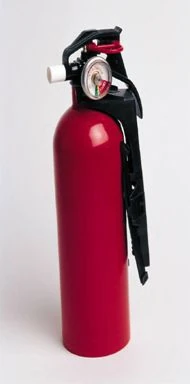
Since we might not have much to say for our artistic skills, we'll have to start with photos or someone else's art and transform it into a sprite. This means that we'll need that photo or image, so go find one! Unfortunately, not any image is suitable for this process. You'll want your source image to follow a few guideline
Sprite Making for the Artistically Challenged: Source Image Example
s:
Monochrome background. A simple blank white or black background is best. Complicated backgrounds can make it difficult to "cut out" the image of the thing we want from the rest of the picture.
Front or side view. You don't want too much angling on your picture. If your picture has a pronounced angle or perspective then the end results are often undesirable or unrecognizable.
Pronounced shapes / features. You want to make sure that the identity of your image is expressed by large recognizable features. Small details and shapes will be lost. The smaller you want your sprite to be, the more detail you will lose, and the more important this is.
Permission. You want permission to use your image!
For the sake of example, I'll be using a photo for a fire extinguisher because it's the best example I could find in the public domain.
Step 2: Removing the Background[]
Open up your image in GIMP.
Select the background with the fuzzy tool (the wand thingy) and click on the background. With any luck, all of the background will be selected and not our extinguisher. If not, set your fuzzy tool mode to add to the current selection instead of replace the current selection and click the parts of the background not selected. You can increase/decrease the sensitivity by moving threshold the slider. Use Do this until you have all of the background selected but (most of) your object is out of the selection. If needed, you may need to remove certain parts of the object from the selection using the fuzzy tool on the subtract from current selection and a low threshold.
Click to see whole image.
In the menu, go to Layer --> Transparency. If the "Add Transparency" option is available, then hit it! Otherwise, skip this step and go to the next.
Delete the selected area. You can do this by either going to Edit --> Clear or by just by hitting Delete on your keyboard.
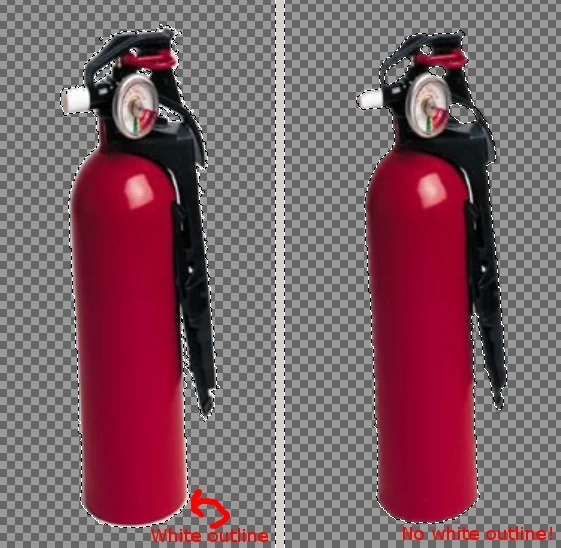
At this point, you may notice a couple things. First, the background is now checkered. This is good; the checkers represent transparency. You may also notice an outline around your image (in my case, the outline is white). This is bad. Getting rid of this is easy: from the menu Select --> Grow. In the menu that pops up, choose between 1 and 3 pixels. 2 is a good guess. This will "grow" the selected area by that many pixels, cutting into your object a little. Then, from the menu again, Select --> Feather. The menu will appear the same; choose ~5 pixels for this one. This will blur the selection boundary. Then finish with Edit --> Clear or just hit Delete again.
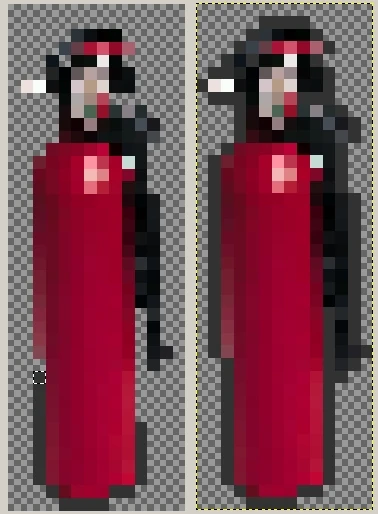
Editing Sprite Making for the Artistically Challenged: Removing background and outline.
The last thing you need to do for this step is get rid of all that empty space! First, hit Select --> None. Then, Image --> Autocrop Image. This will crop the image so that there is no empty space.
Step 3: Resize and Pixelate[]
Now we will be doing the real sprite making process. This likely can be duplicated with many other art programs.
Determine how big we want the smallest dimension of our sprite to be. Most items in the game average this dimension to be around 28 pixels. As a reference, a tile is 16 pixels across. For our fire extinguisher, the smallest dimension is the width so our target number is a width of 28 pixels.
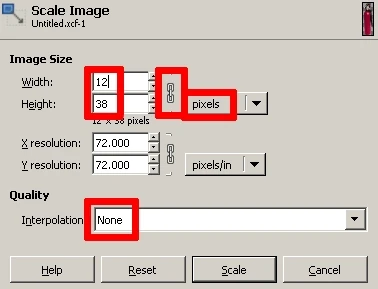
Image --> Scale Image... Here, we have to adjust a couple of things. First, make sure the button on the top right (next to width and height) says "pixels." Then, the button in between pixels and width/height should look like an unbroken chain. Lastly, we have the set the Quality setting on the bottom to "None."
Sprite Making for the Artistically Challenged: Scale menu
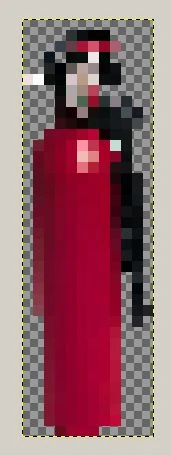
Next we will set the smallest dimension to what we want (in this case, width). You would think that we would set it to 28 but NO! We will set it to HALF that! Thus our width setting will be 14. The height should adjust itself automatically. BORDER NOTE: If we want to add a dark border to our image later, we need to reduce the smallest dimension by another 2. Thus, our final width will be 12. Hit the Scale button. We now have a tiny pixelated image!
Some of the pixels may be partially transparent. This will be evident by the checker pattern seen through them. To make them solid, we need
Sprite Making for the Artistically Challenged
to use Layer --> Transparency --> Threshold Alpha. In this menu, you have a slider. If you go down all the way, everything is solid. If you go up all the way, everything is transparent. You'll have to experiment to find what produces the best image but try for lower settings if possible. When done, hit OK. If you don't like your results, Edit --> Undo (or Ctrl - Z) and try again. I used a setting of 27.
Now we resize again! Image --> Scale Image... We will put our smallest dimension setting to what we finally want. For the example, that would be a width of 28. BORDER NOTE: If we went the dark border route (from step 3 of Resize and Pixelate), then we reduce this number by 4. Thus, we would use 24 instead.
Step 4: Save[]
If you're not using a border, then save your image as a .png file. If you are using a border, skip to Optional Step 7.
Congrats! You have a sprite! Is it perfect? Likely not. Is it far better then what myself and others like me could manage? Totally!
Optional Step 5: Adding a Dark Border[]
So you decided to make a sprite with a border. Good for you. We will try to mimic the borders used in Terraria as best we can. If you're following our example, we should have an image with a width of 24 right now.
We need to increase the height/width of our image by 4 pixels but not through the scale option this time. We'll use Image --> Canvas Size...There, we first break that chain next to width and height. This will allow us to change one dimension without changing the other. Add 4 to width, then add 4 to height. Not finished here yet. Now, find and hit the Center button. NOW we can hit Resize.
Layer --> Layer to Image Size.
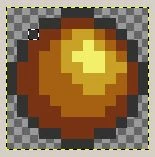
Now we have room to put in our border. And look, the width is now 28 pixels, just like we wanted! What we need to do now is open up a different sprite; use one from Terraria. I'll use Orb of Light
Sprite Making for the Artistically Challenged: Grabbing the border pixel
.
Use the rectangular selection tool to select one of the dark border squares. Copy it (Edit --> Copy or just Ctrl - C).
Paste it into your sprite image and use the mouse to grab it and position at the border. Keep pasting and positioning until you finish!
Go back to Step 6: Save.
Sprite Making for the Artistically Challenged: Finished product with border.
Hints and Tips[]
You can use the following images for creating custom buffs.
Whenever making sprites for moving things (NPCs) always make sure they are facing the left; e.g. a person's front side should be facing the left to avoid "moonwalking".


